
I had a weird thing happen on a SharePoint 2013 client site a couple weeks ago and thought I would share with you all in case you ever find yourself with the same situation.
As you may be aware the Flexi task in Nintex Workflow uses a custom form provided by Nintex by default. This form displays all defined Outcomes as a radio button choice list on the form along with Comments and Item Properties. However, instead of the default form we are used to seeing, what we saw on our client environment one day was that all the Flexi task forms in one site were displaying what looked to be an OOB SharePoint task form.

The Solution
We are still not exactly sure what caused this issue in the first place and Google, for once, was not helpful in guiding our troubleshooting. Luckily I woke up one morning with an epiphany (sad, right?) and knew exactly what to do to fix our broken forms. So, without further adieu, if you ever find yourself with a “broken” Flexi task form like ours, here are the steps I took to resolve:
- Crack open SharePoint Designer to the site with the broken forms
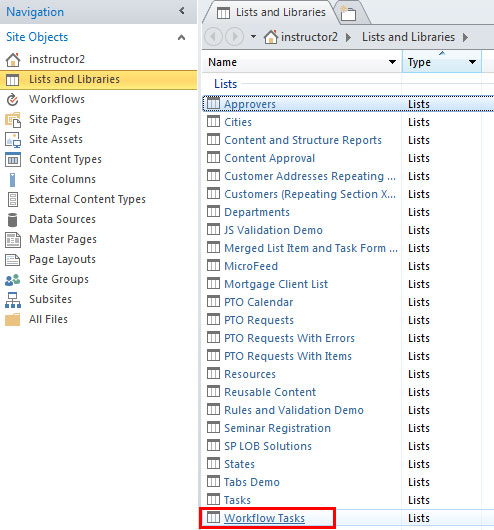
- Select Lists and Libraries from the Site Objects left navigation
- Select the Workflow Tasks list

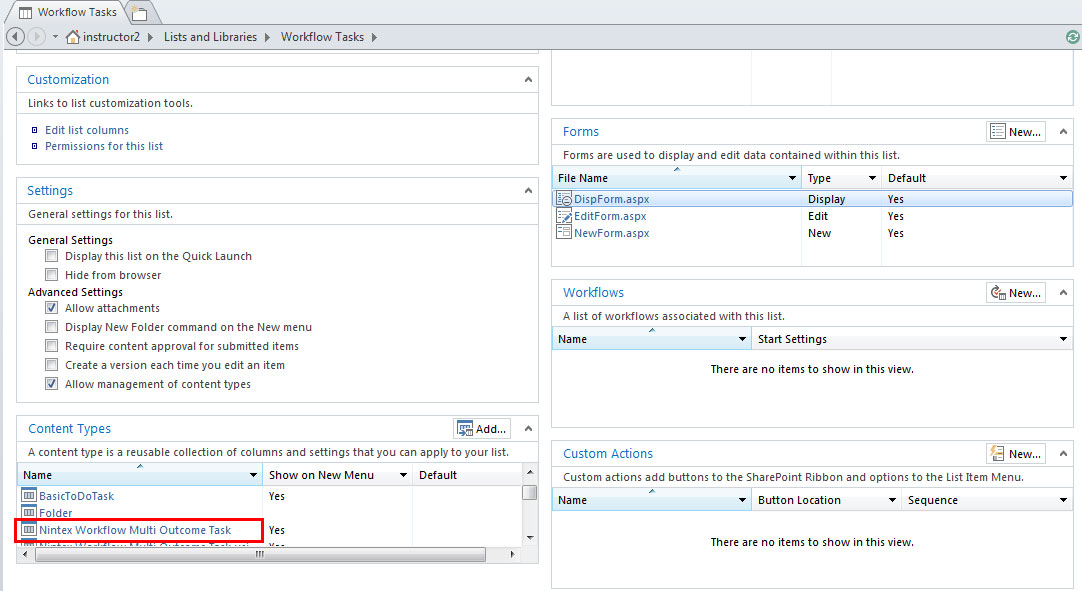
- On the Workflow Tasks list landing page, locate the Content Types section
- In the Content Types section, select the “Nintex Workflow Multi Outcome Task” content type

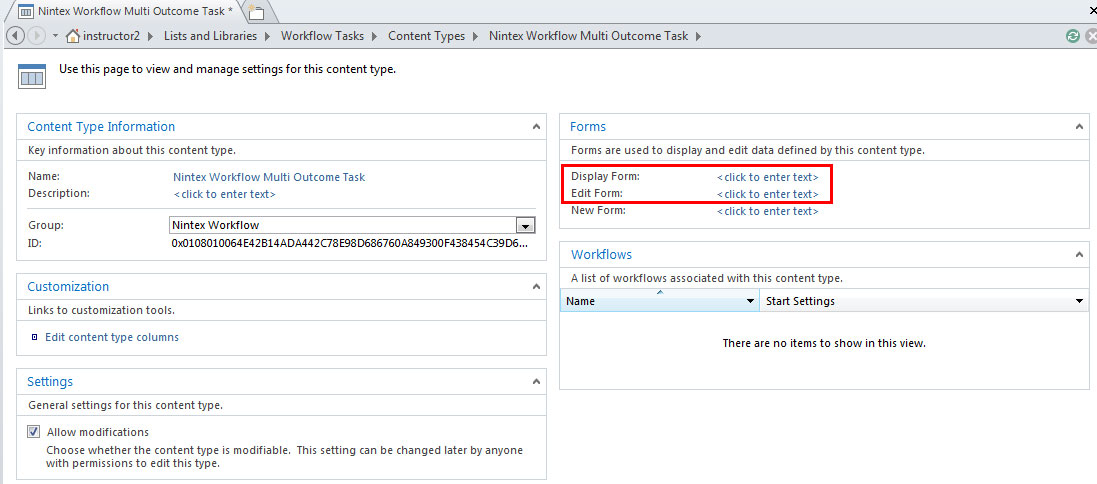
- On the Nintex Workflow Multi Outcome Task landing page, you should see nothing listed to the right of any of the forms in the Forms section

- Click on the link to the right of Display Form that says and paste the following link: _layouts/15/NintexWorkflow/ApproveReject.aspx
- Repeat the previous step for the Edit Form

- Click the Save icon at the top left to save your changes

Voilà! Forms are fixed!! Easy-peasy, right?
NOTE: If you experience this issue in a SharePoint 2010 environment, the steps to resolve should be the same, but the link to paste into the Display and Edit forms will be different. That link should be: _layouts/NintexWorkflow/ApproveReject.aspx.
